Earth Day Celebration Activities

Meet Our Newest Naturalist – Brianna Gullotta
April 22, 2022
The Museum of Science & History Releases Exterior Renderings for New Museum
May 2, 2022
Local Earth Day Cleanups:
Click on the button to load the content from www.groundworkjacksonville.org.
Click on the button to load the content from fernandinaobserver.com.
At-home Earth Day science activities:
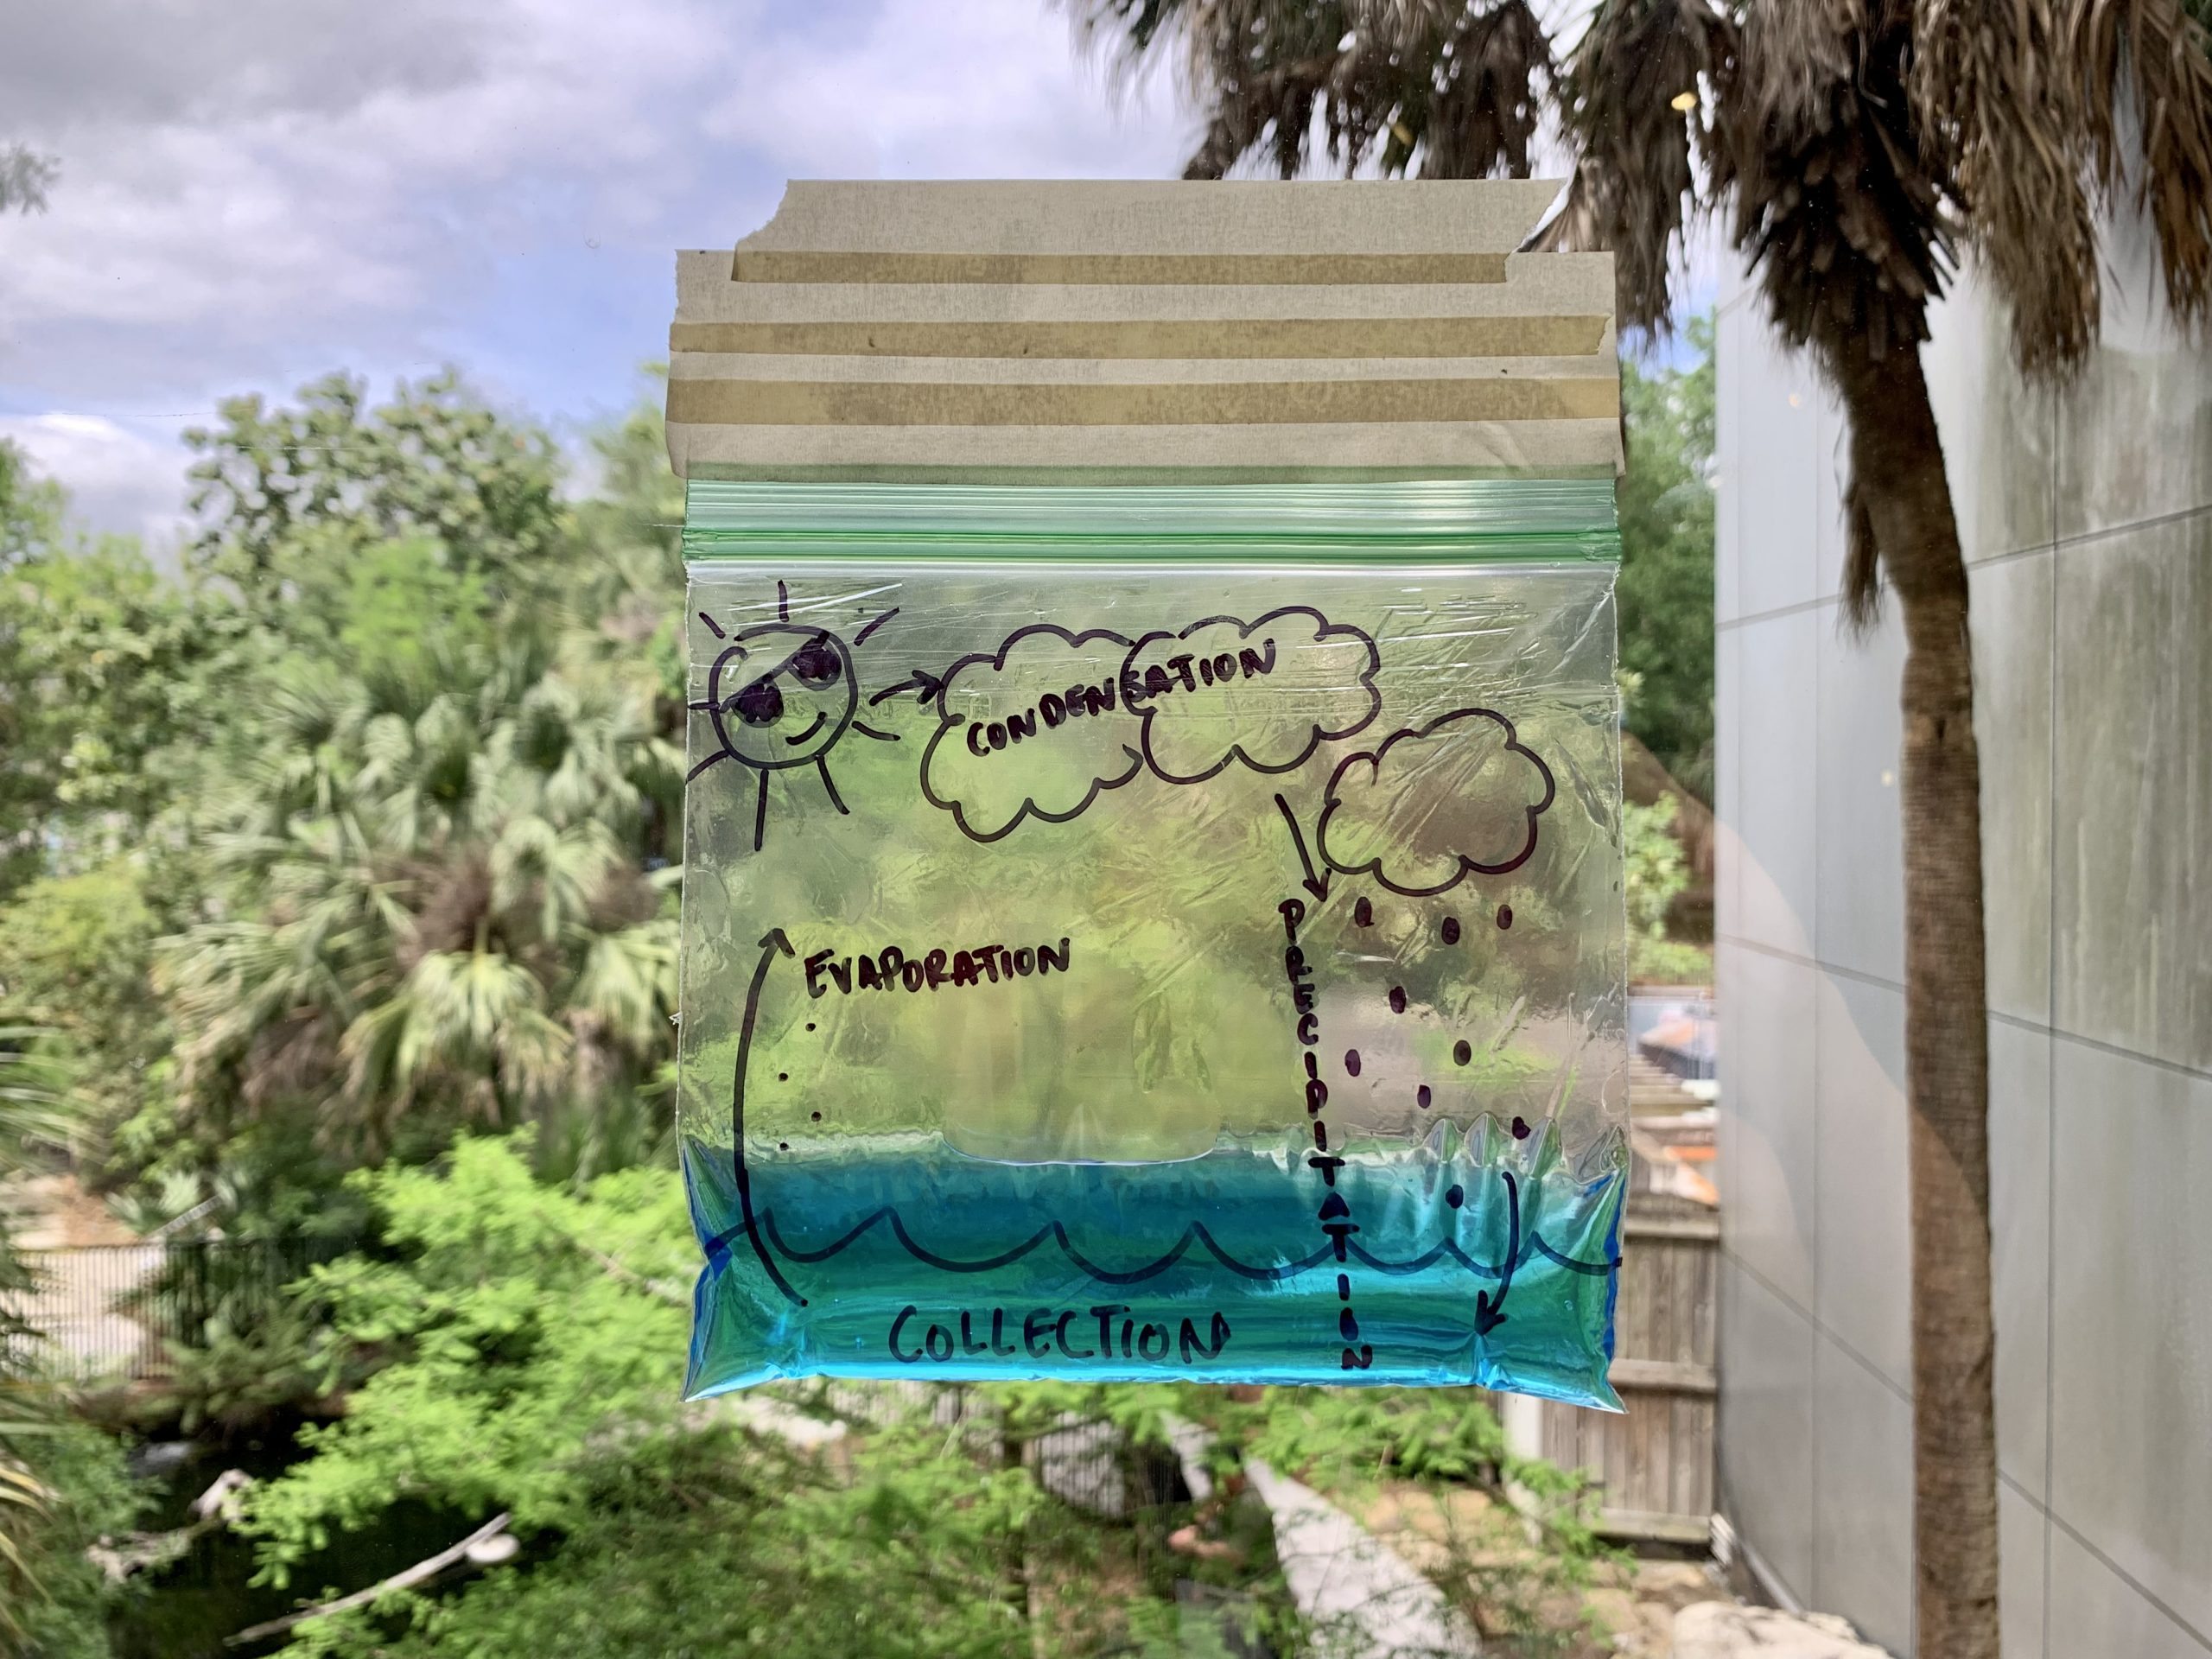
Water cycle in a bag
Materials needed:
– Plastic sandwich bag
– Sharpie
– Tape
– Water
– Blue food coloring
How to:
1. First, draw the water cycle onto your plastic bag using sharpies. Be sure to draw a body of water, sun, clouds, and a rainstorm. You can also label each section correctly: collection, evaporation, condensation, and precipitation.
2. Pour a little bit of water into your plastic bag and add a few drops of blue food coloring. This water represents our ocean, lakes, and ponds.
3. Close up your plastic bag and tape it to a sunny window. Wait a couple of hours and watch our bag go through the water cycle with the help of our sun.
Science behind it:
What is the water cycle? The water cycle is the path that water follows as it moves around our planet. This cycle is very important because water is necessary for all living things, including us!
The sun’s heat warms up our oceans, lakes, and streams, causing some of the water the Evaporate. Evaporation is when water turns into water vapor (or a gas) and rises up into our atmosphere. As the water vapor rises higher and higher in our atmosphere, it begins to cool, causing the water vapor (gas) to turn back into liquid water, creating clouds. This process is called Condensation. Our clouds continue to gather water and get heavier and heavier. Eventually, the clouds get so full of liquid water that it begins to fall from the sky as rain or snow. This process is called Precipitation. The rain and snow add and fill our lakes, streams, and oceans, and the water cycle starts all over again.
Make your own sundial 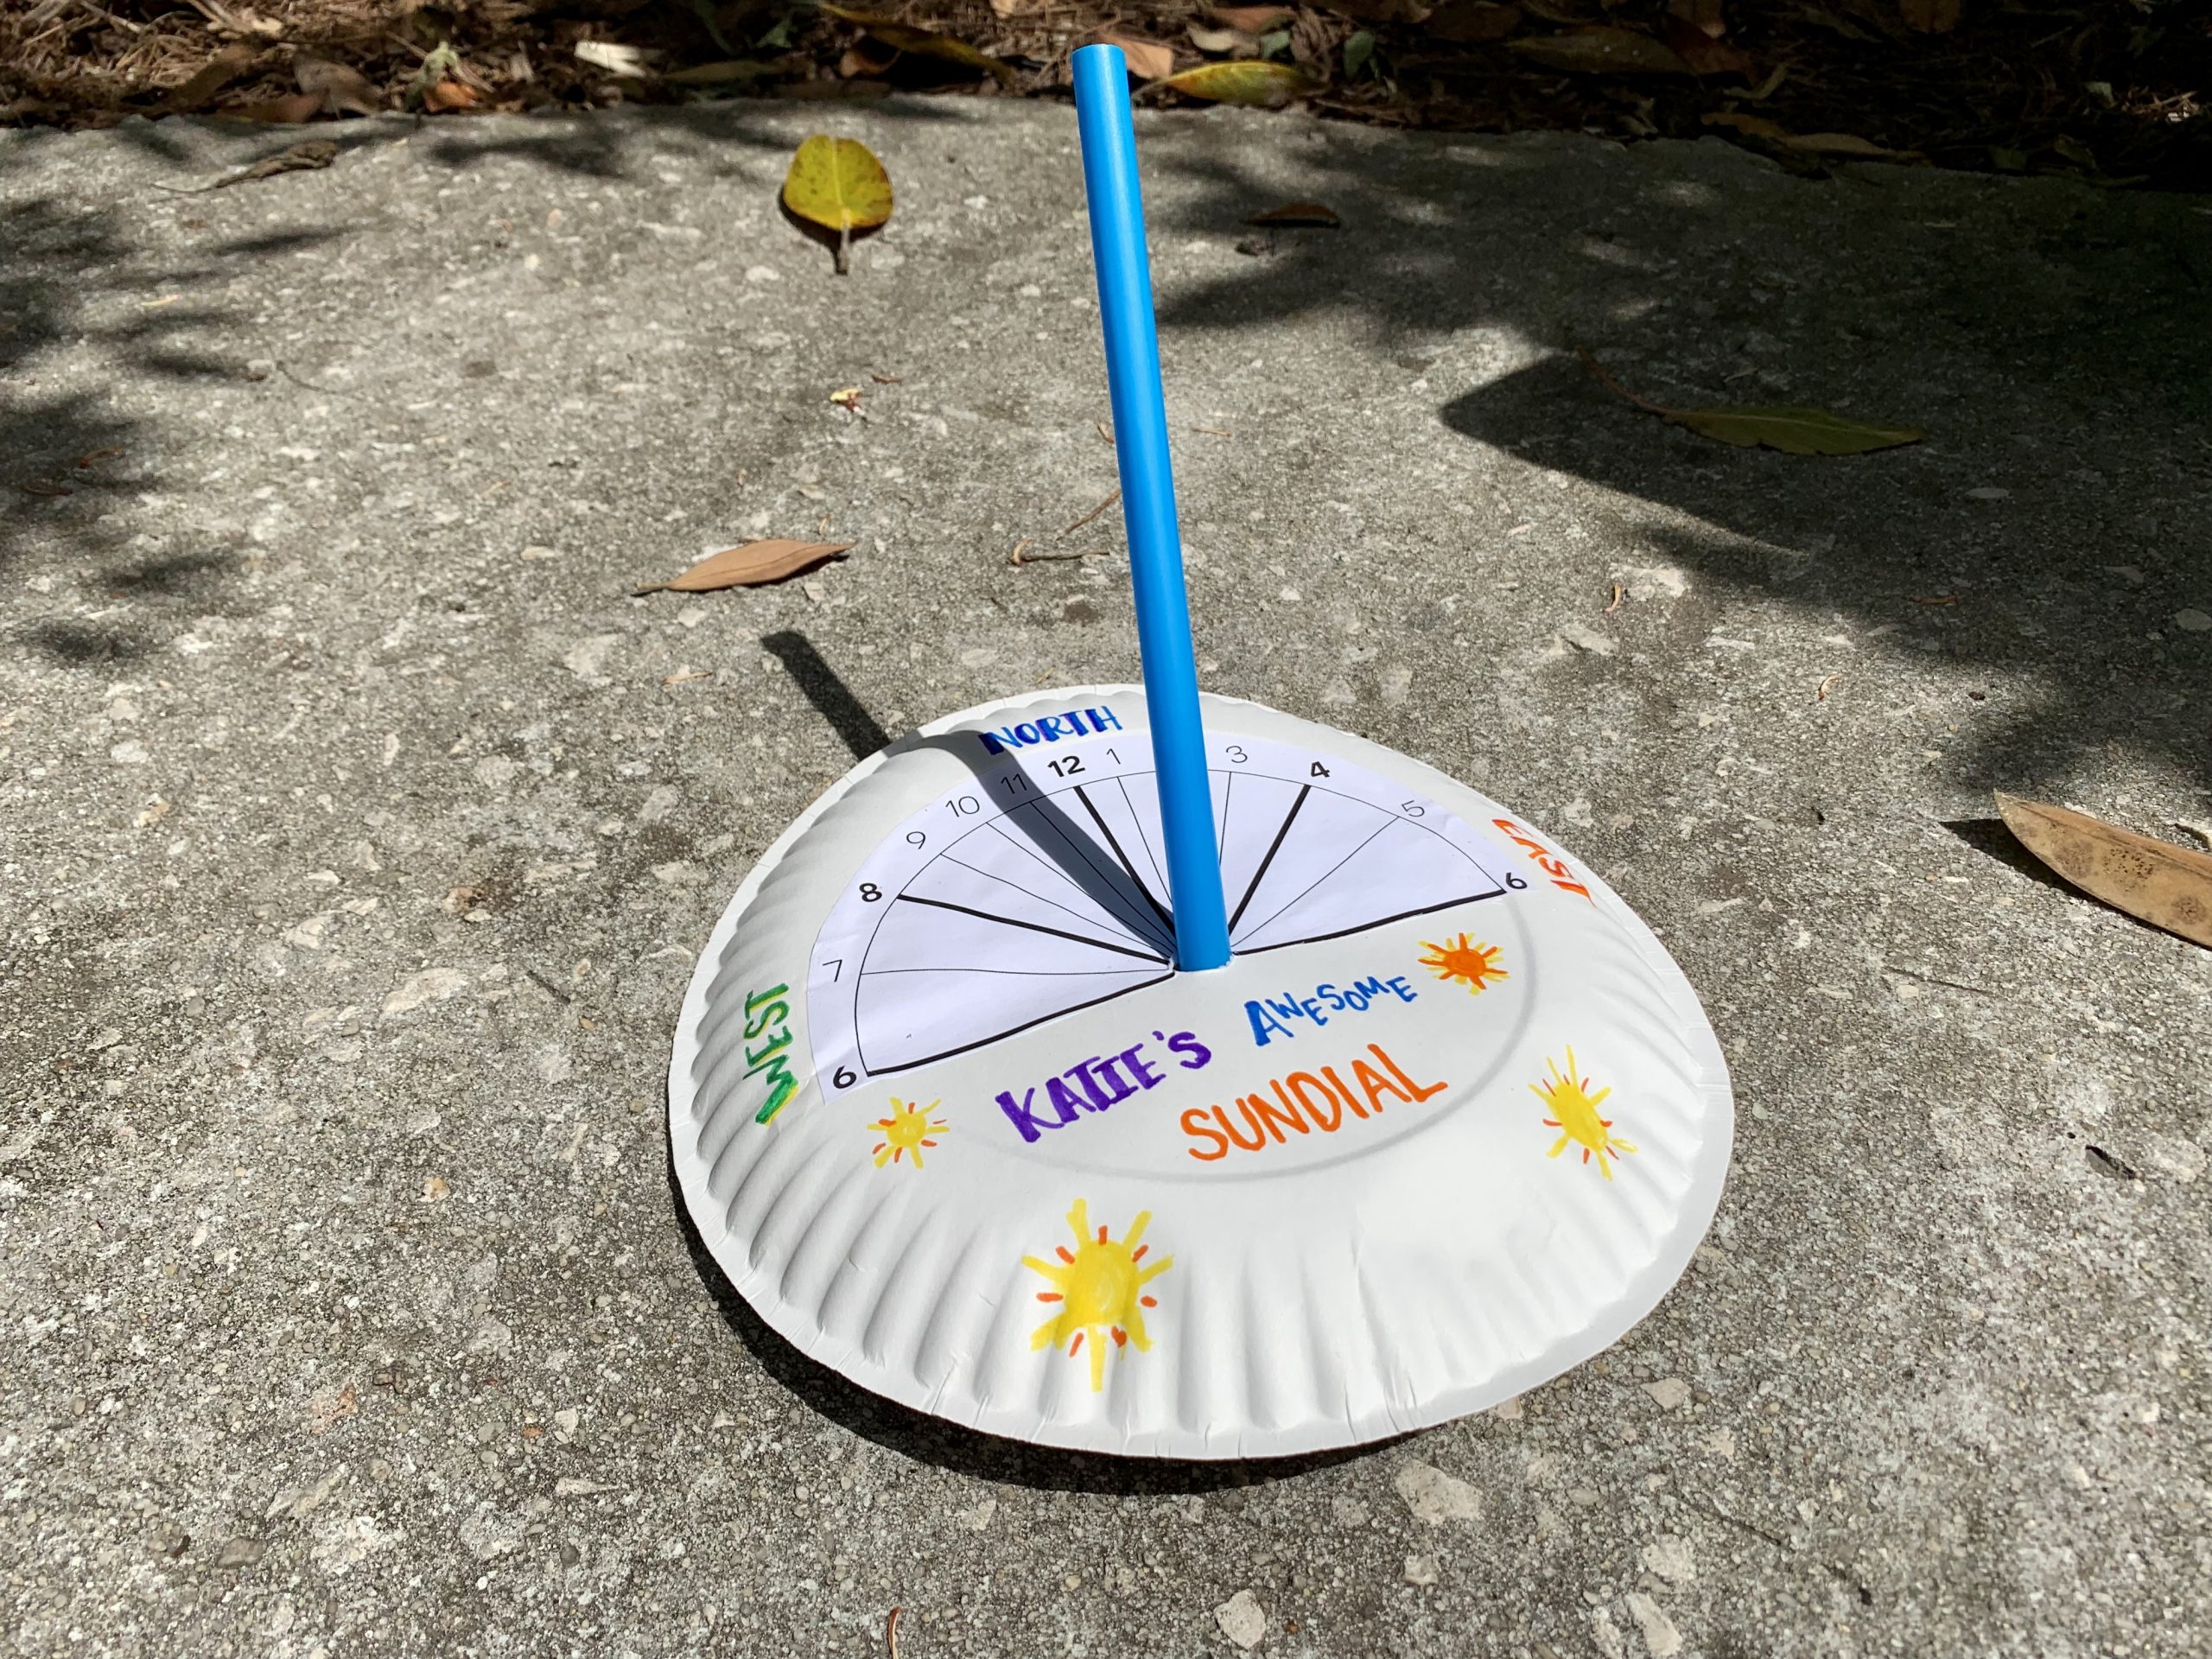
Materials needed:
– Paper plate
– Straw
– Markers/crayons
– Glue stick
How to:
1. Take your paper plate and flip it upside down (so the part that you eat off is facing towards the table).
2. Poke a hole through the center of the plate using a pencil. **Parental Guidance Needed**
3. One the top part of your plate write NORTH with the number 12 below it. This will help anchor the rest of your numbers.
4. Write EAST and WEST on the correct sides of the paper plate with the number 6 next to each direction.
5. Write 1, 2, 3, 4, and 5 clockwise towards your EAST label. Write 11, 10, 9, 8, and 7 counterclockwise towards your WEST label.
6. Decorate and color your sundial.
7. Once you have decorated your Sundial, push the straw through the hole in the middle of your plate. Tilt your straw slightly north towards the NORTH – 12 label.
8. Take your sundial outside on a sunny day at noon and place it in a flat, sunny area. Make sure the NORTH label on your Sundial is pointing north. You can find the correct direction by using a compass.
9. Observe the Sundial over a few hours, and see if you can tell by the straw’s shadow what time it is!
Science behind it:
It is believed the ancient Egyptians first invented the sundial in 1500 B.C. as a portable device that measured time throughout the day. The sundial is the earliest type of timekeeping device. It indicated the time of day by the position of the gnomon’s shadow (in our case, the straw). The gnomon’s shadow would move as the day progressed, pointing to the hour of the day as the Earth rotates. It is important to note that even though it looks like the sun is moving across our sky, it is Earth that is rotating.